
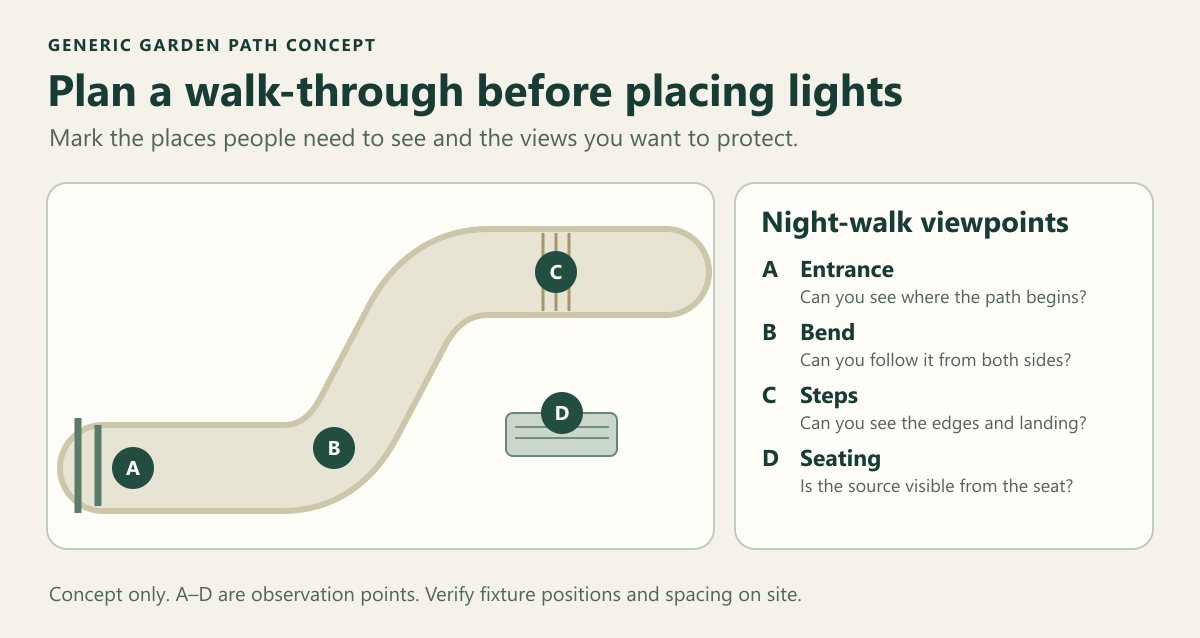
Walk the route before you mark fixture positions. Note where people enter, turn, step up or down, and stop to sit. Then mark places where you want to limit light, such as a seat or a neighboring window. A row of fixtures spaced evenly on a plan can still leave the far side of a bend hard to follow or put a bright source in someone's line of sight.
Mark the places where people need light
Sketch the path edges, surface, turns and changes in level. Mark the clear walking width where it changes, including pinch points near walls or planting. Add the existing lights, normal walking directions, seating and any accessible boundary viewpoints. Use these marks to choose where you will stand during the night check.
| Place on the route | What to plan for | What to check after dark |
|---|---|---|
| Gate or entrance | Make the start of the route easy to identify. | Look from outside the gate and from inside the garden. |
| Bend or junction | Make the continuation and change of direction visible. | Approach from both directions and check the near and far edges. |
| Steps or a change in level | Make the change in level and the landing visible. | Check from the top and bottom, where it is safe to do so. |
| Straight stretch | Fill gaps that make the route difficult to follow. | Walk the whole stretch and note exactly where visibility drops. |
| Seating or boundary | Keep light on the path and out of sensitive views. | Check from the seat or an accessible boundary viewpoint. |
Check the light from the walking line
When comparing bollard and path lights, use the actual fixture's light distribution and the proposed mounting height and orientation. A low fixture can still cause glare when people can see the bright source directly. Pay particular attention to bends, steps and places where walkers, seated people and neighbors see the same fixture from different angles.
If the light extends beyond the intended area, test one change at a time, such as a different aim, an approved shield or a lower output where the fixture allows it. Check the route again after each change. Match the control schedule to actual use. See the DarkSky and IES principles for responsible outdoor lighting for guidance on light direction, level and timing.
Walk a trial layout after dark
Match the fixture mounting to the point on the route
| Catalog configuration | Listed mounting and size | How to use it in the trial |
|---|---|---|
| LMV-CPD0406-H70-S | Ground spike, listed at 70 cm high | Consider a planting edge where the ground can accept a spike. Record the actual installed height and check both edges at the bend from the usual walking directions. |
| LMV-P180-1 | Wall-mounted, listed at 180 × 218 mm | Consider a wall beside an entrance where the substrate and mounting space suit the fixture. At the trial height, check the threshold and whether the light source is visible from the seating area. |
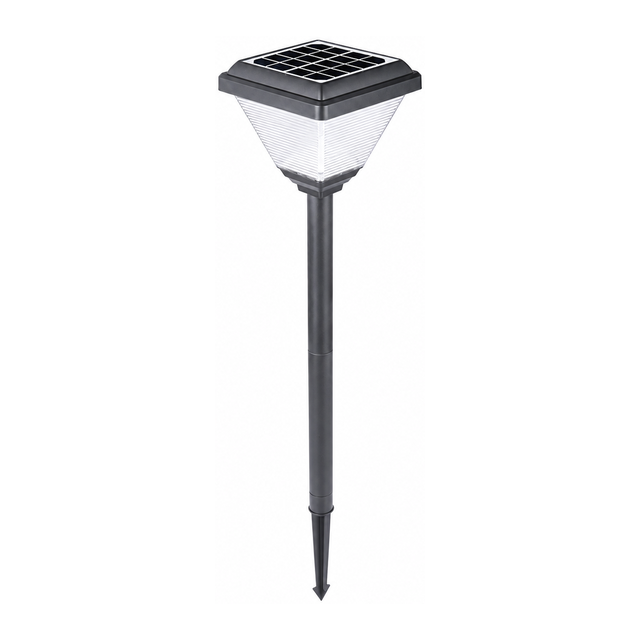
Use the dimensions to plan the test positions. Set spacing or make a coverage decision from applicable photometric data and the actual site trial. The worked example below uses hypothetical observations.
Set a baseline before changing the layout
Leave nearby lights in their usual operating state. First walk the route with the trial lights off. Then turn them on and repeat the walk, pausing at the same marked viewpoints. Record the fixture position, height, aim, output and control mode. Keep these settings fixed except for the one adjustment you are testing. If a neighboring viewpoint is inaccessible, note that limit in the record.
Worked example: Retest the bend from the gate and the seat
This example uses the observation points in the sketch. At B, people walking from gate A need to see where the path turns. At D, a seated person should be able to look toward the path without the trial fixture shining into their view. The observations below are hypothetical and describe a visual trial.
| Check | Observation | Decision or next action |
|---|---|---|
| Baseline, trial lights off | From A toward B, the far edge of the bend blends into planting. From D, there is no bright source in the direction of B. | Record the gap at B and keep D as a comparison viewpoint. |
| Initial trial, same viewpoints | The near edge of B is visible, but the far edge still disappears on the approach from A. | Adjust the aim of the trial fixture at B, if permitted. Keep position, height and output fixed. |
| Retest after the aim change | Both edges at B are visible from the two walking approaches. From D, the trial source is outside the seated person's direct view and the seat remains outside the bright area. | Keep the revised aim for this visual check. Record the setting and review the whole route again. |
| Check for a new problem at C | The step edges and landing remain visible from both approaches. | Keep the layout for the visual review. If C becomes harder to see, revise the aim and repeat the B, C and D checks together. |
Use the same record on your site. Note the date and time, viewpoint, direction, fixture setting, observed issue, adjustment and result. If a change improves the bend but introduces glare at the seat, keep that trial open. Try another permitted adjustment and repeat the walk from both viewpoints. If the project specifies measured light levels or public-route requirements, arrange the appropriate check using the actual installation and fixture data before closing those items.
Planning questions
Should I put fixtures on both sides of the path?
Try a one-sided layout first if the fixture can reach the full walking width. Add or move a light where the trial shows a persistent gap. Check the opposing approach before retaining a two-sided arrangement, since it changes which sources walkers can see.
Can I copy the spacing from a photo of another garden?
Use the photo as a reference for appearance. Establish spacing with your own path width, bends, mounting height and fixture distribution. A similar-looking fixture can direct light differently.
What if the path looks fine when dry but reflects glare after rain?
Repeat the affected viewpoints under representative wet conditions when the route is safe to walk. Record where the reflection appears and from which direction. Review aim, position or shielding within the fixture's allowed adjustments, then check that the edges and steps remain visible.
How do I check a path with motion-controlled lights?
Walk both approaches at the pace people normally use. Note where the light comes on, whether the next turn or step is already visible, and whether the light stays on long enough for someone who pauses. Check again from seating or other places where movement could trigger the lights unnecessarily.
When should I repeat the trial after planting changes?
Repeat it when new or seasonal growth blocks the beam or changes what walkers can see near a bend, step or entrance. Revisit the original marked viewpoints first. Use the old record to separate a change in planting from a change in fixture aim or output.
Related products
The Square Stake Path Light and Flat-Top Solar Lantern are examples to review for different positions. Confirm each configuration's mounting and light distribution for the position you are testing.
Share your path layout
Send LUMELVO your path plan. Mark the clear path width, changes in level, walking directions and areas you want to keep dark. Add the hours when people use the route and any observations from your trial.